Table of Contents
- Tufte-latex
- neovim + vimtex + deoplete
- git repo with a web front page
- Terminal Workflow
- Basic $\TeX$ Installation
It has been slightly more than I year that I have started using $LaTeX$. As I gain familiarity with the typesetting language over this time, I have also gained more confidence in dealing with its package management and locations of its files and folders. Now, I have a workflow and environment that I am relatively happy with.
Tufte-latex
The biggest change is probably that I am now mainly using tufte-latex for my notebooks. This layout resembles how I used to write my notes when I was still hugging a bunch of physical notebooks everywhere I go. I used to leave a large margin on the right side of each page that allows me to jot down remarks and pointers that I make for myself. Turns out that this is well-known method for making notes, and turns out that this is widely referred to as the Tufte style, and that is how I found the package on the repository.
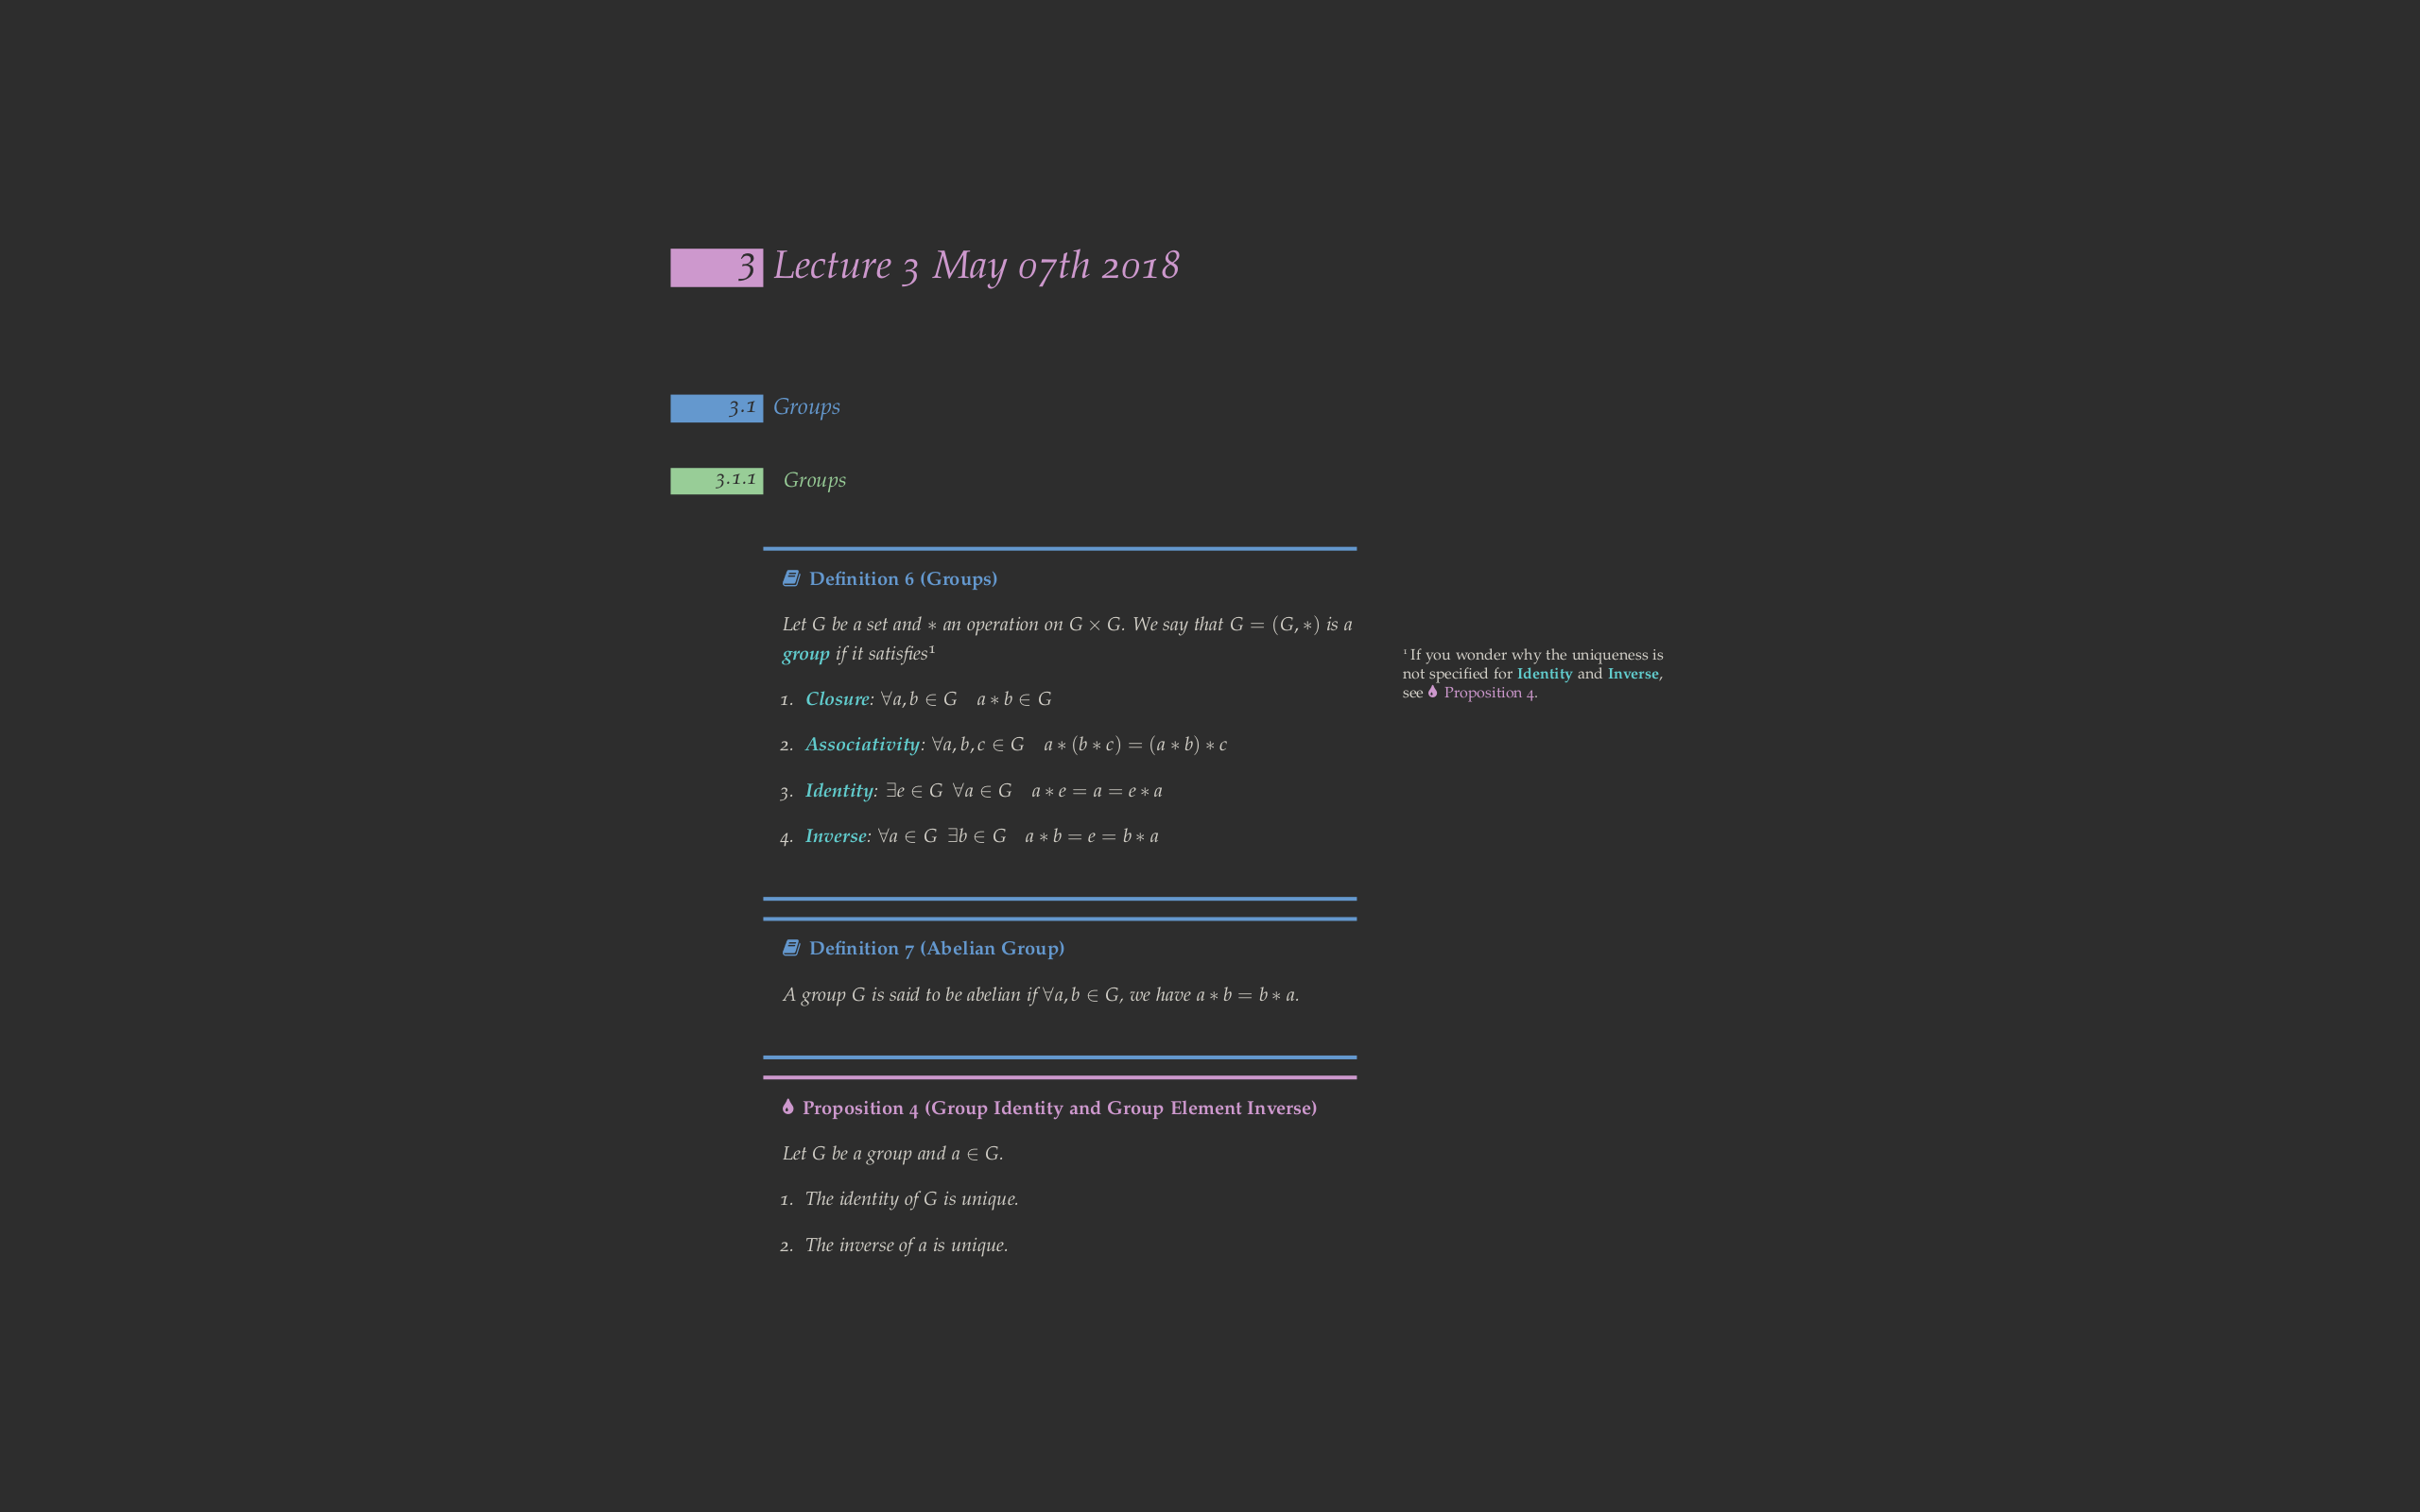
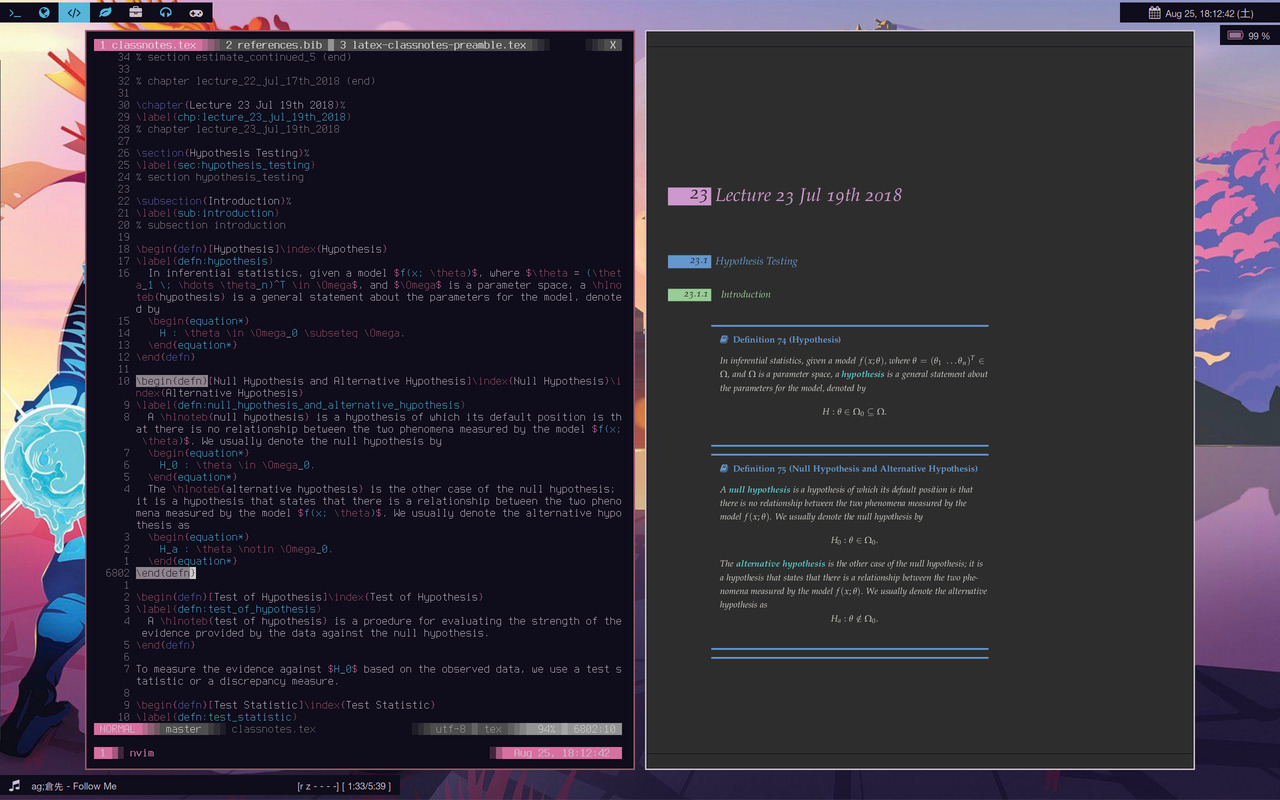
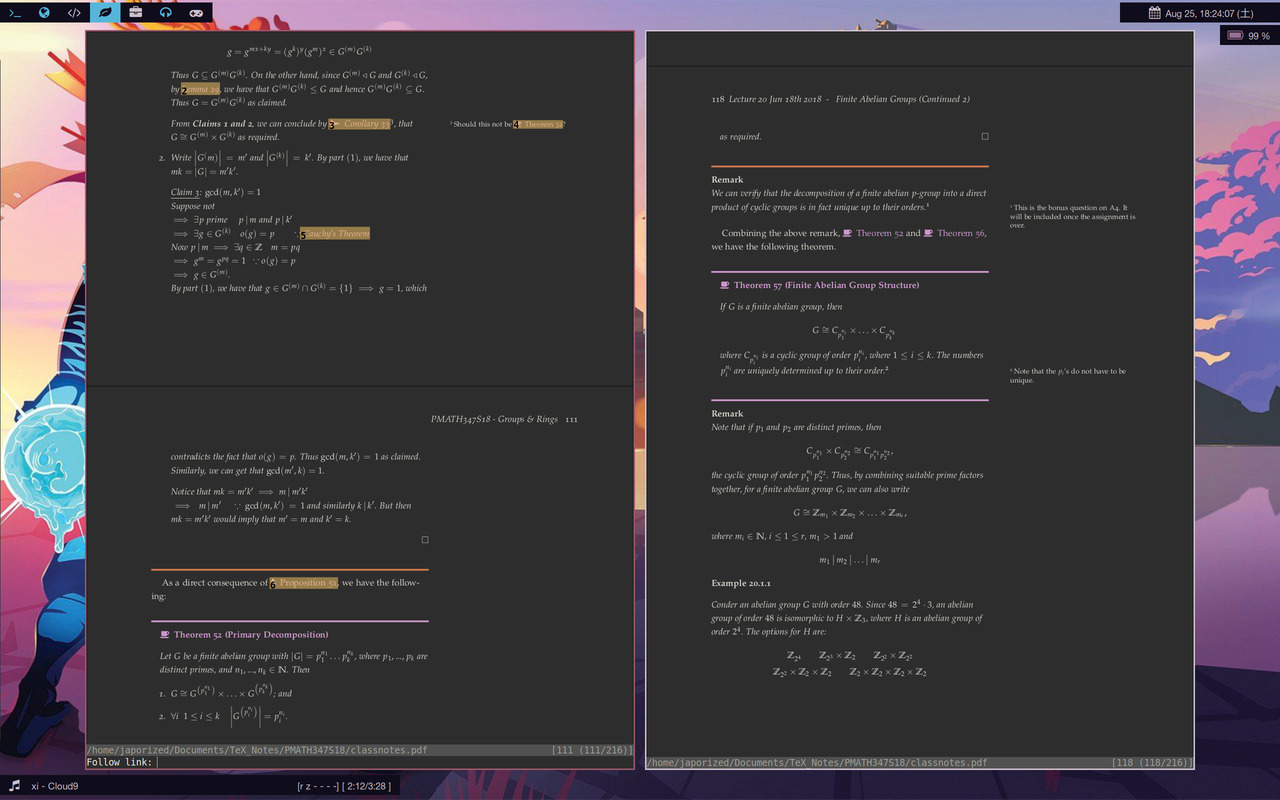
For the sake of not straining my eyes while going through my notes for long durations, I compiled my documents with a dark (#2D2D2D) background and light (#D3D0C8) foreground Colours are based on base16-eighties . Definitions, theorems and special notes are colour-coded for quickly helping my eye find what I need. References to previous theorems and definitions are linked directly to where they are stated, which works great together with zathura Minimal PDF viewer that uses vi-like keybindings for navigation. . This workflow allows me to read my notes without creating too much distraction searching through other parts of the notes for what I want.
neovim + vimtex + deoplete
I have also switched to fully writing my notes in neovim neovim is an extension of vim, a powerful text-editor that keeps your hand on the keyboard to get things done, instead of using a mouse, which takes time moving your hands and require you to make precise movements to do one thing. . The biggest reason for the move is really just because all the management work of my $\LaTeX$ workflow are already in the terminal (e.g. git) or are easier/faster to perform in the terminal (e.g. testing a plain pdflatex build, making use of texliveonfly when I need to). Plus, I was already using Neovintageous on Sublime Text, so the switch was quick and easy.
With vimtex, I can have a configured compiler running the the background and compile my documents as I save, which is a great difference from my unintuitive method of having to keep a separate compile button in Sublime Text.
I have, personally, always found the default completion mechanism in vim to be somewhat lacking, since it is much slower to having to cycle through completions and see everyone of them to make sure that you are getting what you want. That is where deoplete comes in for me, and it is much faster to just have your options laid out, and at a glance you can use the very same bindings (as the default) to get what you want.
The only thing that I miss from Sublime Text is multiple cursors, which I have ways to work around that in neovim. In particular, all I need to do is:
- Search for the string that I want to replace (e.g.
/grups) - Navigate using
nand/orNto the string that I want replaced. - Hit
cgnand replace the string with my new string. (e.g.groups) - If I want to replace the very next string that appears (which is highlighted), I just hit
.. If I want to skip several of the strings and get to, say, the fifth string after the current one, then I just hit5n.(assuming that my cursor was still on the first result)
This method, does not give me the power to make the same edit at multiple locations, that has little to no similarities to each other, at the same time. All I can really do with that is just navigate and hit . to repeat my last entry.
git repo with a web front page
I wanted a way to access my .tex and PDF files across my devices is an easy and accessible way. Of course, services like Dropbox comes to mind, which would be a blessing since it would make sense that it is a lot more accessible for mobile. And of course, Dropbox offers some level of version control, which is what git offers. But I never enjoyed the idea that Dropbox is continually syncing my files as I edit and compile, especially since the compilation spits out a lot of other auxillary files which are also changed on every compilation. This works Dropbox like a slave and slows down my syncing process with my non-$\LaTeX$ files whenever that is the case.
Then the existence of this site clicked in my head. I could keep a git repo of my $\LaTeX$ documents, have git ignore the auxillary files, and keep a website that allows me to access my notes. An additional plus side of things is that with this setup, I can access my notes from any device with an Internet connection. This also means that sharing my files with others is a breeze, since all they have to do is go to the website where I have a list of the notes that I am writing, or have written.
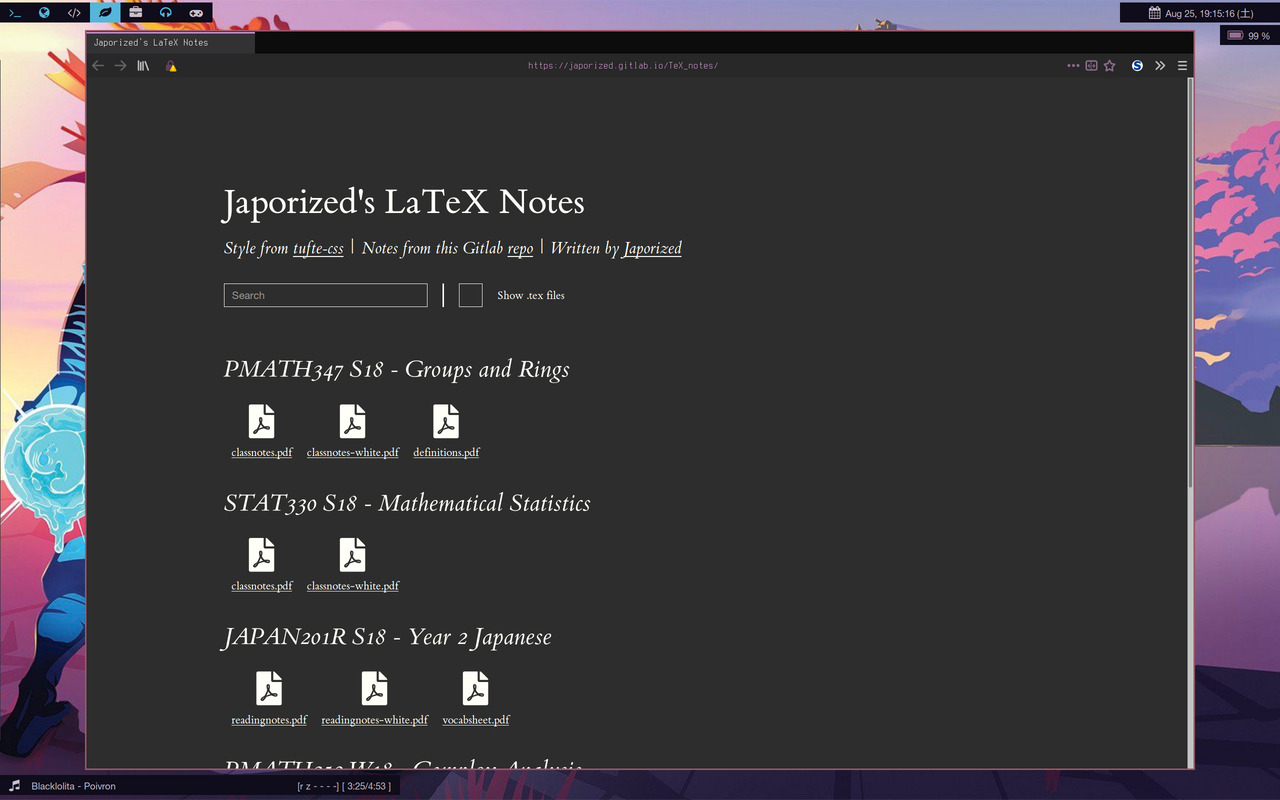
The search bar acts as sort of a filter, in which users can search for, say, the title of the course to filter out the rest. For example, typing in “PMATH” (or “pmath”) will hide away all other notes aside from those that has the “PMATH” code.
There is also the option to show all the .tex files in the directory in the event that one wants to download it.
Terminal Workflow
I created two bash scripts to automatically create .tex files with the appropriate directory for me, one being new-classnote and the other being new-assignment.
new-classnote will create a directory in my $\TeX$ repo and put me into neovim for editing. For example, if I run
new-classnote PMATH433
it will create a directory named PMATH433 in my $\TeX$ repo, and use neovim to create a new classnotes.tex file, which will immediately pull my classnote template that I have prepared.
new-assignment does something similar, but I generally keep my assignments in Dropbox, since I cannot share most of them anyway, until perhaps later.
Basic $\TeX$ Installation
I decided to put this as the last item since this is what most people don’t do. Most $\TeX$ users will just download the entire $\TeX$ distribution, which is great since one will almost never have to worry about missing packages and can just happily call for the \usepackage command. This, however, is luxury for those with ample space on their hard drive, which is also the case for most machines these days, unless if you are using a machine from the early 2010s with an solid state drive (SSD). I belong to that latter group.
This does not mean that I have to constantly battle with $\TeX$ packages though, especially when there is texliveonfly, which will grab missing dependencies for me. This also allows me to better understand how the texlive installation works.
Most users will end up having over a few gigabytes of files for their texlive installation.
Mine is only at 9.9MB. 😉
Overall, I am quite happy with how my workflow and environment has become.
Hopefully whoever’s reading this finds the workflow inspirational. If you want to steal copy my setup, check out dotfiles, bin, and TeX_notes.
Comments