A brief overview of how I riced my system, turning it into an eye candy, and a workspace of my liking

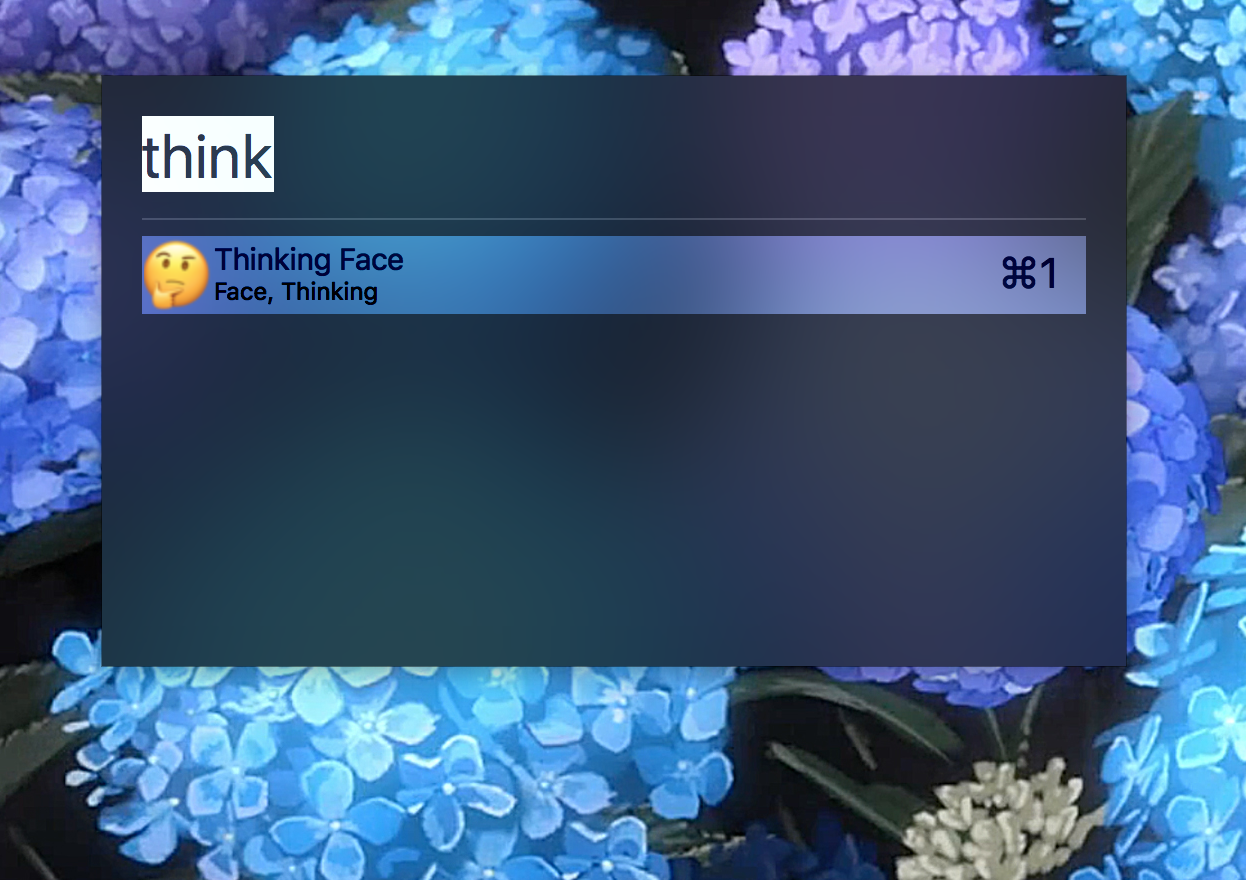
I’m not someone that can really hide my excitement at seeing beautifully crafted setups; my last post about ncmpcpp is a proof of that. Well, sort of. I’ve dreamed of having my own setup for the longest time, although it is only until recently that I started to pay more attention to automation tools and tiling window managers. Of course, there are no tiling window managers that work natively on macOS, but that does not stop the community from coming up with ways to achieve that, giving birth to tools like Amethyst and Hammerspoon. I’ve used both for some time, didn’t really get attached to Amethyst, and Hammerspoon can only do so much with window management, although I still use Hammerspoon for that nice emoji selector.
Enter chunkwm
The discovery of chunkwm ended that desire, and changed it into a product that you now see. While it is not a purely native solution, it utilizes native features of macOS to achieve this end. It works rather reliably despite being in alpha. It relies on a third party hotkey daemon, which is created by the same developer so you’re assured that the two will work well together in the foreseeable future. If you’re using Homebrew, execute these to get chunkwm and (s)khd:
brew tap crisidev/homebrew-chunkwm
brew install chunkwm
brew install koekeishiya/formulae/khd
If you prefer logging chunkwm stdout and stderr to /tmp, simply add the --with-tmp-logging option for chunkwm. If you prefer a leaner version of khd, brew install koekeishiya/formulae/skhd instead (also by the same developer). You may also check out the repo that is maintaining chunkwm for Homebrew.
By default, the Homebrew version of chunkwm installs 3 plugins: border, tiling, ffm (focus follows mouse). There will be a set of instructions for you when you install chunkwm via Homebrew, and you should be good following that (I did not mean for this to be a guide, sorry). After tinkering with the configuration, try chunkwm without using it as a daemon for yourself to see how it works in the background (if you’re interested). Otherwise, just tell Homebrew to let launchd do its job for you.
brew services start chunkwm
With that, you’ve gotten yourself a nice window tiling manager. It’s still imperfect for now, and certain windows may not get detected and hence managed (e.g. Telegram Desktop and windows in XQuartz, in which the latter will likely not be supported due to its nature). But for most of your applications, it will work out perfectly.
Of course, launching chunkwm won’t do much for you if you don’t launch (s)khd with the proper configs. Grab the sample configs from koekeishiya’s (the developer) repo for chunkwm (skhd/khd) and put them in your home directory as .khdrc (or .skhdrc). Run khd (or skhd) to see how it responds to your keys, and once you’re ready, use Homebrew to let it be handled by launchd.
brew services start khd
The Nerdy Utility Bar
You’re probably wondering at this point as to why that utility bar that I have is not available to you. Why cause it does not come with chunkwm (while it seems that the developer may be interested in creating one)! This is where another application comes in. Meet Übersicht.
This tool fits what I need perfectly, and its widgets are written in a language that I am familiar with (it’s JS, but it appears to work best with Coffeescript). The thought of having a utility bar struck me and a simple online search found me nerdbar. Coincidentally, this nerdbar (there’s another nerdbar of the exact same name) was created by another person that used kwm, of which chunkwm is a successor of. After stripping off the parts that I do not need, I was left with a somewhat broken nerdbar.
This is where I started on what I believe to be uncharted waters.
Parts where its reliant on kwm definitely don’t work with chunkwm since they’re written differently, but after some reading, the binary file that serves as a cli to chunkwm, chunkc, allows querying for certain information, and that is how it led to the ability to highlight the current desktop that I am on, which is similar to how it was implemented in the original nerdbar. All that’s left for me to do is just to use Coffeescript to decide where I am on my system. For the sake of organizing my workspace, I decided to grab icons from the La Capitaine icon theme, make some modifications, and slap them onto the utility bar.
To get the id of the active desktop using chunkc:
chunkc tiling::query -d id
Since I now have the utility bar, it makes sense to hide the native menubar to make way for more pixels. But with that out of the way, and even though there is a border highlight for the currently active application, I like how the native menubar tells me the current application that is active. Luckily enough, there’s a command from osascript that can do this for me.
/usr/bin/osascript -e 'tell application "System Events"' -e 'set frontApp to name of first application process whose frontmost is true' -e 'end tell'
Slap that on another .coffee file for a different refresh frequency and we’re done (well almost, but the rest is just similar processes).
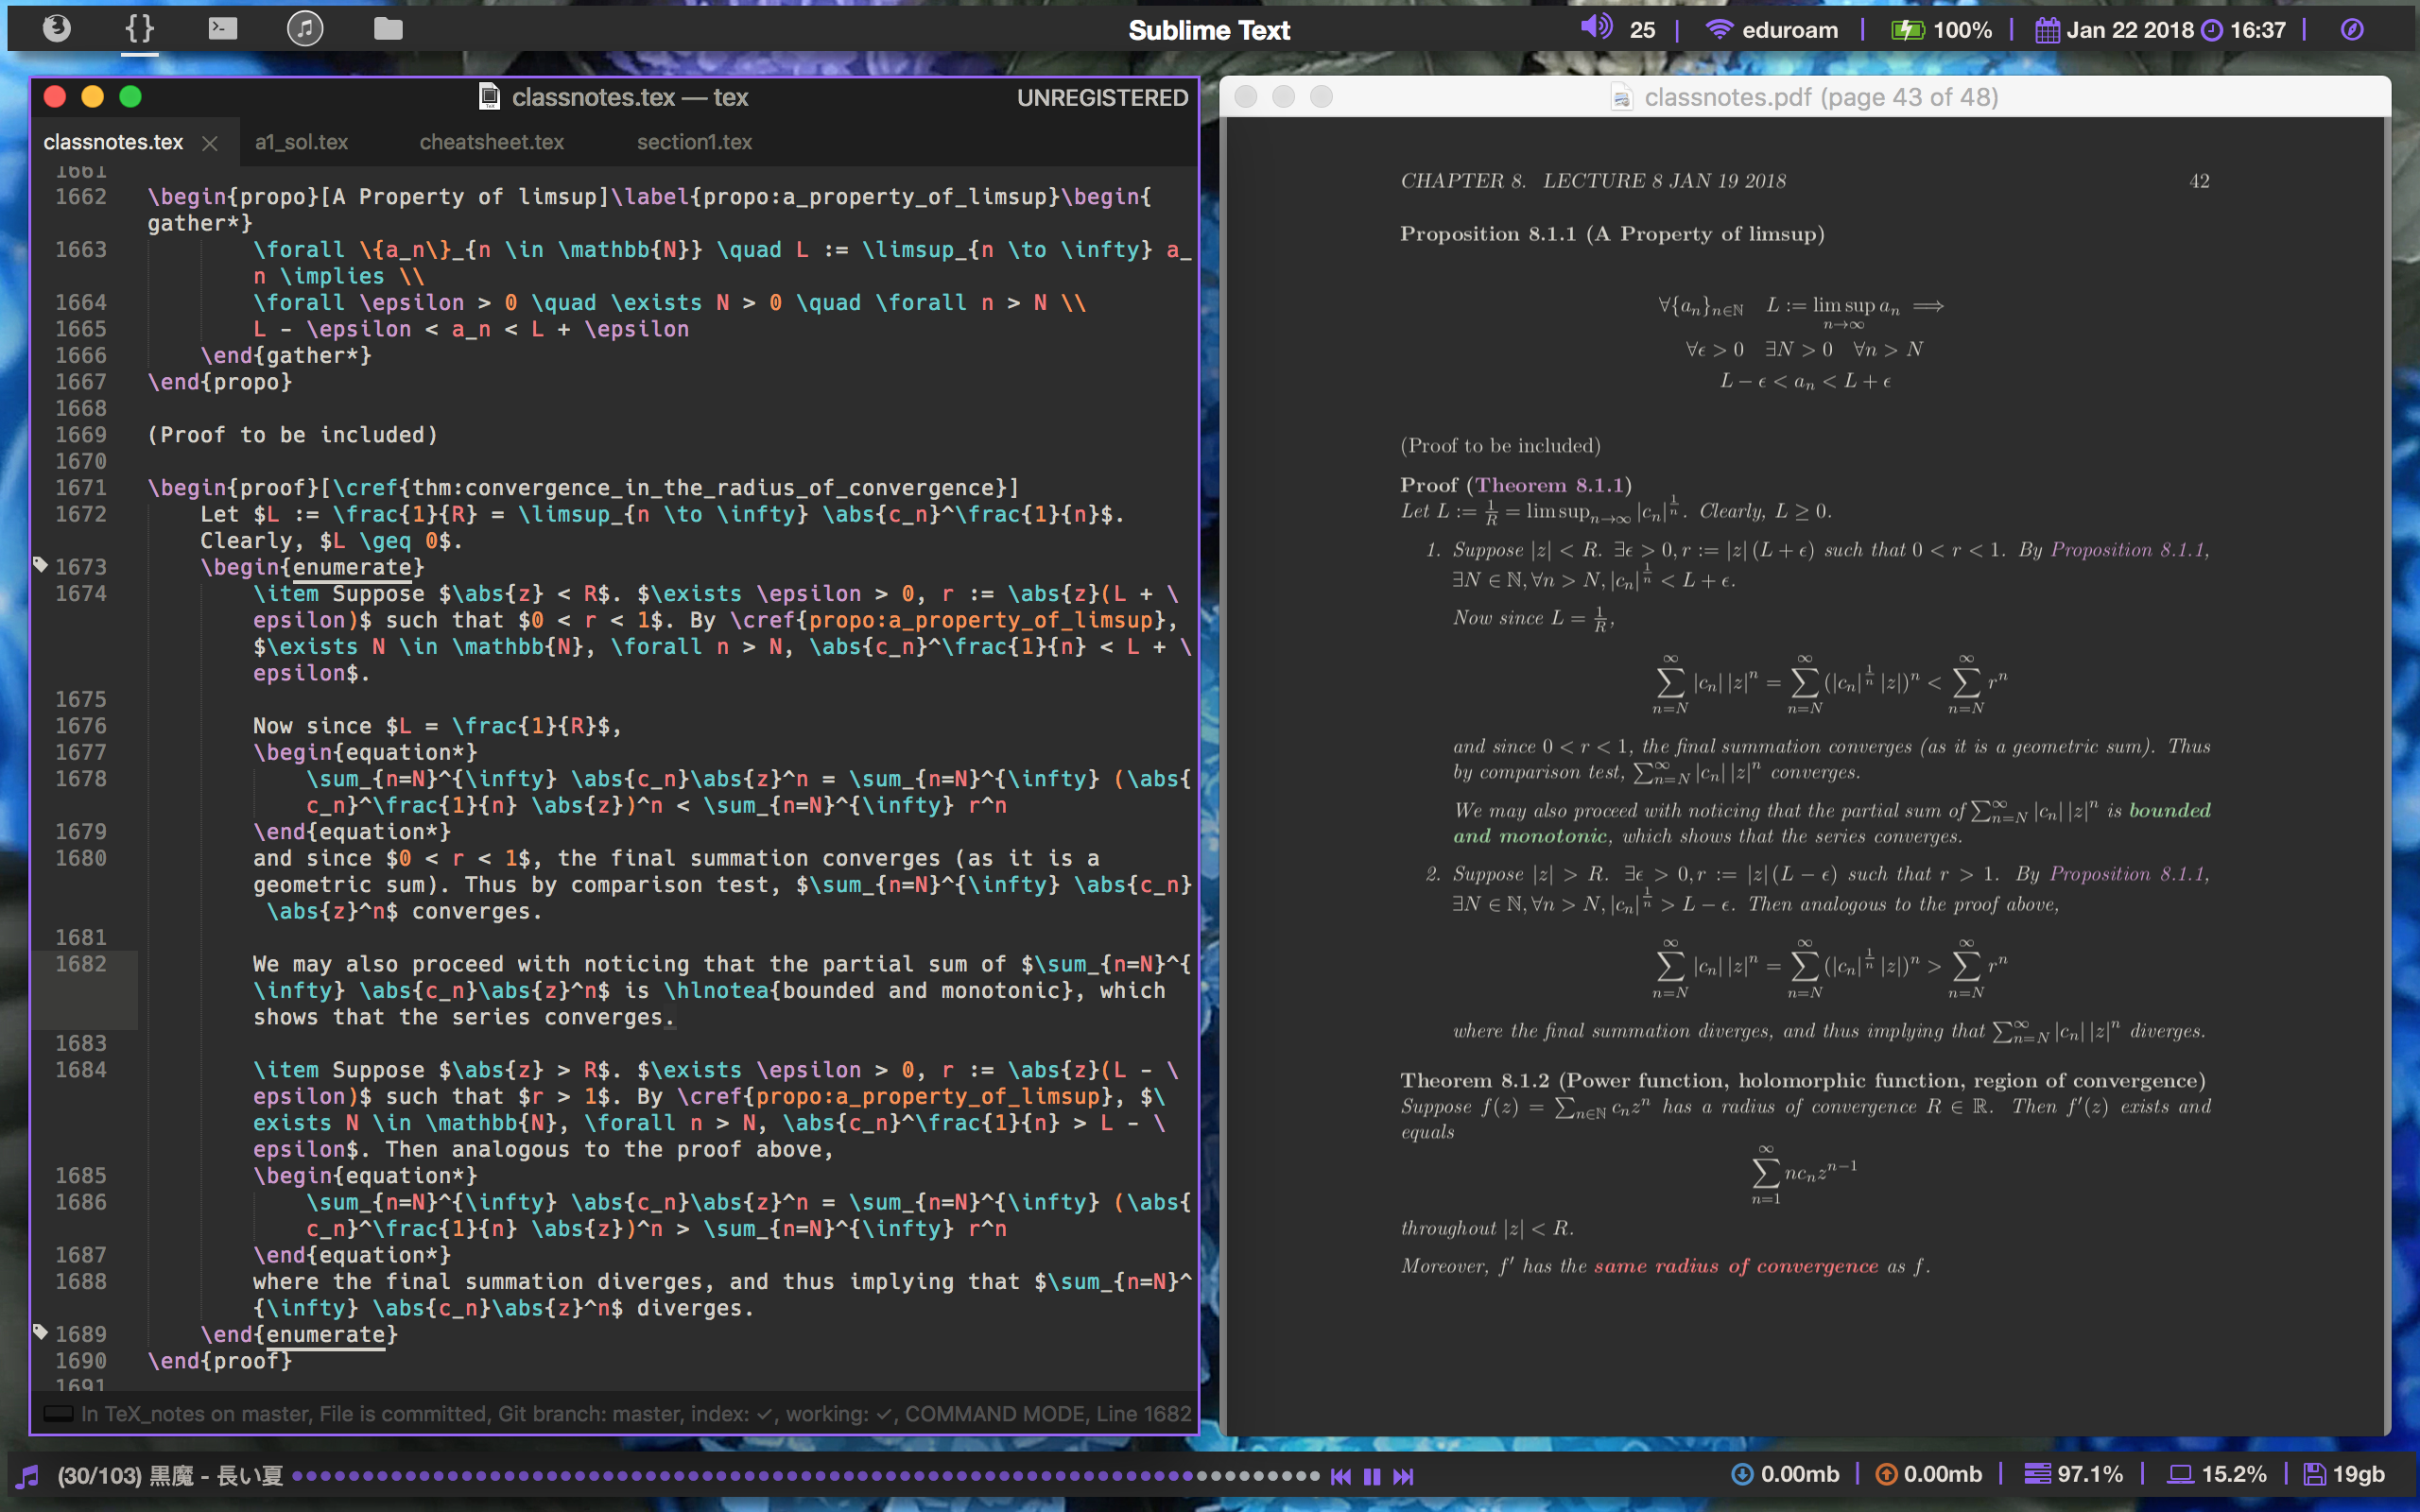
With that, we have a nice space/desktop indicator and application name display.
A known issue with my setup
The desktop switching click in Übersicht would sometimes go into an infinite execution that will keep bringing you to the same desktop every time you try to switch to another one, and I cannot trace the source of that bug. Übersicht is not that friendly for debugging (and styling) unfortunately. But I barely ever click on the buttons anyway cause it’s become a habit to do everything on the keyboard.
Wanna be a thief?
This is one of those chances where you get to publicly steal something and not get caught with it. Feel free to grab my dotfiles.
You can also create issues if you want me to try to fix or improve something and I’ll happily try to resolve them as a pastime.
Comments